Sunday, 29 December 2013

Scrappy Sunday etc :)

We did have a wonderful Christmas in Wales and Chester with our fabulous family. We arrived back in London yesterday afternoon and I did some sewing today on my new 'spare' sewing machine and she pieces like a dream:


I have missed my sewing - it's been 11 days - definitely was starting to have withdrawal pains!! So as well as making a start on my 'Lippy Quilt' (that's her on the table above), I made 4 more of my 1/2 log cabin scrappy blocks ... all greens today as the green stash is almost catching up with my pile of pinks:


DH also bought me this amazing free standing lamp for the loft / sewing room as the light up there is not good this time of year:


And my dear SIL bought me some delightful fabric for Christmas:


And dear niece got me some Glinda ear rings!


Lots of happy memories to cheer me up as I return to work tomorrow :(

A very thankful (and bit spoiled?!) quilter linking up with Sunday Stash and Karen over at Sew Many Ways:

Wednesday, 25 December 2013

Merry Christmas Everybody :)

Last Friday when the lady at the sewing machine repairs shop told me my Juki and I could be parted for over 2 weeks, I had a little meltdown. Did they have a machine I could borrow? No. Could they service her in a week? No. (I have a quilt to make by January 23rd!) There was nothing to be done ... unless ... meet my new machine now sitting with me in the car as I'm driving home:


DH was at his Christmas do in London so we texted a little:


Unwrapped this morning and realising I am a very very lucky lady to now have a 'spare' sewing machine! And even luckier to have a wonderful husband who understands me ... completely :)


Wishing you all a very Happy Christmas. I look forward to staring and sharing with you in 2014.

Saturday, 21 December 2013

Last quilt of 2013 :)

I finished and posted this cute baby quilt for Aunty Ruth this week and that brings my quilt-making of 2013 to an end! We'll be heading off for a week with family soon - lots of Christmas parties and good times ahead :)
 
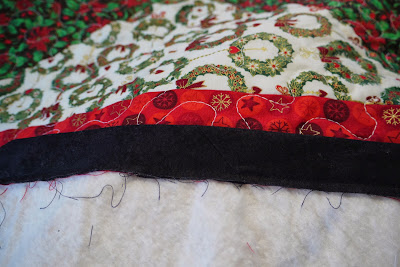
So here is my final quilt of 2013 - number 17 - made for baby Esme (probably shouldn't have photographed it against a bright red background?!):

 
Backed with anti-pill fleeced fabric:


My Juki went in for it's first service yesterday but the shop said it could be up to two weeks before I get it back so, bless him, knowing I couldn't not sew for 2 weeks, DH has bought me a sewing machine to have as a 'workshop spare' ... all wrapped up so I'll show you later!

 
Linking up for the last time in 2013 with Amanda Jean @ Crazy Mom Quilts and Sarah @ Confessions of a Fabric Addict.

Thanks to Amanda Jean and Sarah for hosting their link-ups throughout the year and to all the lovely quilters who pop by, take a look at my posts and leave such encouraging comments. Merry Christmas xx


Wednesday, 18 December 2013

She's a bit lippy!

Just a quick WIP to share because to be honest, who can really be making lots of new quilty things with just a week to go until the big day? Well, not me!

This is going to be my retirement gift for a lovely friend whom I've worked with on and off since 1996. In a mainly male environment (at that time), we refused to not still be feminine and probably took it a bit too far by reminding each other when the lippy (lipstick) was fading ... thus began some fun! 

We've been very lucky to work together again just before she retires. Her favourite colours? Pinks and greens ... and the design? Well, a pair of pink lips - of course!


Linking up with Lee at Freshly Pieced


Sunday, 15 December 2013

Christmas Cushion, etc so no Scrappy Sunday!

This is two Sundays now I haven't made any scrappy blocks but in my defence (not that I'm putting myself on trial!), I have been making lots of other things. 

First up two more mini Pants Bags (my tutorial is here) - one for our cleaner at work ... she's such a nice lady and always admires the quilty things I make. She's not expecting this so I'm hoping it will be a lovely surprise for her:


Not sure yet who this one's for yet but it's good to have an emergency in waiting! 


My friend Shauna @ lovinquiltin made one of her own from my tutorial - and it's gorgeous ... why not pop over and take a look? It was a lovely post to read - thank you Shauna :)

DH's colleague makes delicious chutneys and jams and we've benefitted from one or two jars this year so I offered to make her a Pants Bag and she told me her favourite colour was green:


And finally, a Christmas cushion (pillow) for dear SIL who has a reading room with elephant curtains so when I came across this fabric in my stash:


I knew I had to make her a cushion out of it ... isn't it fabby? I didn't want to cut it up though ... some fabrics tell their own story which, I think, gets lost if it's cut in to so I decided to go for a simple 18" x 18" bound cushion. I had some 'old' Christmas fabric in my stash for the binding that matched perfectly:


Always fun making the cushion this way because you just look at it and go ... really?!


But you get there in the end :)


(PS Still haven't wrapped my Christmas gifts!)

Friday, 13 December 2013

Christmas finishes - am getting there ...

I started making this Christmas Throw for my niece at the end of November and finished sewing on the binding this week - not bad going. Not bad at all :)
 
Before starting the quilting, I have my routine  - I get all my bits together, then give the machine a bit of a clean (it always needs it!) Ewwwww:


I have two ways of joining the binding ends. The 'quick way' - hiding the end in the beginning - and this way:


Which do you prefer? Here's the front:


And the back:


And the label:


Also, I made this little Pants Bag (for ballet shoes) for the daughter of my 'frolleague':


And over the weekend, I shall be quilting and finishing this baby crib quilt:


Did someone mention wrapping Christmas Presents? Pah! Plenty of time yet :)
 
 
Linking up with Amanda Jean @ Crazy Mom Quilts (Finish it up Friday) and Sarah @ Confessions of a Fabric Addict:

Wednesday, 11 December 2013

A couple of newbies :)

I can't believe myself sometimes! I still haven't written any Christmas cards - I will do them tonight! But I have started making two new quilts and they're nothing to do with Christmas!
 
The first one is another teddy bear baby quilt - this time for Aunty Ruth (no, she's not having a baby ... she is 89!) She has asked me to make a quilt she can gift to a family friend who's due any day. We don't know whether it's going to be a boy or a girl so have started with a baby girl quilt and - well, there's a 50/50 chance I'm right!
 
Nell helped out too:


Newbie #2 - although I wasn't planning on starting this new quilt until after Christmas, it needs to be finished by January 23rd as it is my gift to a friend who is retiring and that's the date of the leaving party. She loves pinks and greens, here's what I'm thinking - mostly from my stash (and with some recent purchases):
 
 
And, instead of making it easy on myself, I am 'designing my own pattern' ... again ... why do I do this to myself? I have no idea if it will work! More to come on this over the next few weeks:


If you haven't already, please take a look at the post for my Pants Bag tutorial - these little bags will take you about an hour to make if you need a last minute Christmas Gift:
 
 
Linking up with the lovely Lee @ Freshly Pieced who's sharing some delightful quilts from her new book Vintage Quilt Revival ... sadly, not available in the UK until March :'(


Sunday, 8 December 2013

Pants Bag Tutorial :)

Thank you for joining me today. I have been asked by a couple of my followers how I make my Pants Bags so I have written this tutorial today. It's my first time ... so please be gentle with the comments!
 
Firstly - why do I call them 'Pants Bags'? They are drawstring bags for holding pants, socks, etc when you go on holiday - I  don't know about you but I like to keep my pants packed - I don't like to 'put my drawers in other people's drawers!' When I first started sewing, I didn't know what else to call them and 'Pants Bags' stuck - now all my friends and family only call them Pants Bags. The youngest recipient was aged 1 and the oldest is 89 :)
 
They can vary in size - mine are usually 14" x 14" but, for the purposes of today's tutorial, I have made a mini Pants Bag (starting with 9" pieces, finishing size - about 8"), ideal for gifting with Christmas goodies in. Here we go.
 
 
Pants Bag Tutorial
 
Materials:


1) For your outer bag: 2 x 9" x 9" pieces - these can be co-ordinating, the same, patched - whatever you choose! 
2) For your lining: 2 x 9" x 9" matching pieces
3) For your cord / ribbon casing: 2 x 3 1/2" x 9" pieces - again, co-ordinated or matching
4) Ribbon or craft cord - if using cord, you can make the casing narrower than 3 1/2" - length of ribbon / cord to suit your taste
 
I use a 1/4" seam allowance throughout.
 
Step 1
 
Make your outer bag. Take your two 9" pieces and sew them together on 3 sides, remembering to back stitch at the start and finish:


Step 2
 
Make your lining bag. Take your two 9" pieces and sew together on 3 sides, remembering to back stitch at the start and finish BUT this time you need to leave a 4" gap open along the bottom edge:
 
 
Press to set seams, turn right side around and press that gap in the seam so you have a nice straight line:


Step 3
 
Take your casing pieces to the iron, you need to fold over the shorter edges twice then fold in half and press. Put it on the top of the outer bag to measure - you want to have about a half inch gap on either side, if it's too big, you can always  fold over a bit more or trim:
 

Pin in place on both sides of the outer bag, making sure they match up and check that you haven't pinned the front to the back:

 
Take to sewing machine, remove any machine part you have around the needle(bobbin case?) so that you can fit the opening of the bag around the machine:


Stitch a 1/4" seam all the way around the casing remembering to back stitch at start and finish:


Step 4
 
Turn the outer bag inside out. Tuck the casing into the bag. (Sometimes I do 'double casing' but for these gift bags, this is a simpler method.) Take the lining bag and place it inside the outer bag. Right sides should now be facing each other:
 

Pin at the sides to match up the side seams and pin elsewhere, if you want:


So, with your outer bag and lining bag pinned together, and the casing tucked between the two, take to the sewing machine and sew all around the opening, just a bit to the left of your last 1/4" seam:


Step 5
 
Pull your lining bag out of the outer bag:


Then, put your hand through the gap in the lining bag and gently pull through the outer bag:


Step 6:

Once you have pulled it through so that both right sides are out, take it back to the sewing machine and sew that lining gap closed. You can slip stitch this but to my thinking, this is the bottom of the bag, it will have 'stuff' on top of it and if you match the colour of the thread and sew a nice straight line close to the edge of the bag, it really does look fine: 


Step 7:
 
Pop the lining bag inside the outer bag and you are nearly done! For the ribbon or cord, you decide how short / long you want it to be. I measure afterwards like this. You will need to cut two lengths the same size:


Attach a safety pin to one end and thread it through both sides of the casing. Then starting from the opposite side, take your second piece of ribbon and thread again through both sides of the casing:
 
 
You will have damaged / frayed ends so I burn all 4 ends slightly with a lighter to seal (young sewing munchkins, please ask Mum or Dad to help you here!):
 
 
Tie the ends in a knot and that's it!


Step 8:

VOILA! You have made a Pants Bag! Stand back and admire your work. Fill with goodies (or pants!) and hand it over.


This one took me an hour to make yesterday but then I have made lots in the last few years and let me assure you it gets quicker, the more you do!
 
It's a great way of using up scraps, practising designs, I have paper-pieced and even quilted some of mine and no two Pants Bags are the same ... ever! 
 
I know there are lots of tutorials out there (I've looked at a few myself!) and there are many different ways of making drawstring bags ... you might find theirs are much better than mine. Feel free to share this tutorial and if you do make one or want to add photos of a Pants Bag I have given you, I'd love to see them, so have set up a flickr page for you to visit.